Summary
Some organisations like to completely customise the aesthetic of their workbar, main menu, background, and footer, to create an engaging, on-brand frame for their site.
There are three parts to this, and we strongly recommend they are all done as a whole so that you create a joined-up design. Before you begin to upload the three independent image files, make sure they work together.
Steps
- Navigate to ‘Administration’ and then select ‘Wallpaper’ option located under ‘Branding’
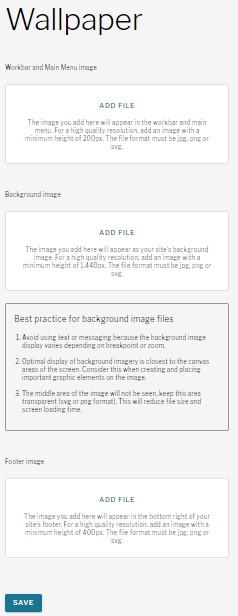
Workbar and Main Menu image
2. Select ‘Add File’ to view files on your local drive
3. Select the font file to add
4. Select ‘Upload’
Please note:
- The image you add will appear in the workbar and main menu
- The workbar and main menu file are to have a minimum width of 1,440 px and a maximum height of 200px
- The file format must be jpg, png or svg.
Background image
5. Select ‘Add File’ to view files on your local drive
6. Select the font file to add
7. Select ‘Upload’
Please note:
- The image you add will appear as your site’s background image
- For a high quality resolution, add an image with a minimum height of 1,440px and a maximum height of 400 px
- The file format must be jpg, png or svg.
Footer image
8. Select ‘Add File’ to view files on your local drive
9. Select the font file to add
10. Select ‘Upload’
Please note:
- The image you add here will appear in the bottom right of your site’s footer
- For a high quality resolution, add an image with a minimum height of 400px
- The file format must be jpg, png or svg.
11. Select ‘Save’
Expected result
This has been updated on the site
Roles/permissions
Brand manager