Workflow
What is Workflow?
Workflow is a publishing tool for producing regular, accurate and traceable content from multiple users.
Once a publishing team is established, your content changes ‘workflow state’ and the appropriate member of the team is notified. Progress then depends on the various skill sets involved responding to each other’s comments and working together.
Comments can and should be added before every workflow state change. This means the next person is aware of any amends, ideas or instructions that need to be reviewed and considered.
Roles in Workflow
There are three potential roles in a publishing team. They are:
- Publisher
- Editor
- Author
States in Workflow
There are five workflow states:
- Draft
- Needs review
- Reviewed
- Published
- Unpublished
Global and local publishing roles
As the name suggests, global roles give users site-wide permissions, whereas local roles are locked down to specific sections
Our 3 separate publisher roles can be global or local. To make someone a global publisher, editor, or author, you must do so as a webmaster.
1. Access a user’s profile
2. Select ‘Account settings’

3. Select the ‘GLOBAL ROLES’ tab
4. Check or uncheck the role you want to assign or unassign

5. Save
You can also do this in bulk via the user management screen.
To establish your publishing team at a local level… you must access the appropriate section as a section manager.
1. Go to section
2. Select the overflow menu and ‘Manage members’

3. Select ‘Add User’

4. Type the user’s name and select them from the list that appears

5. To add multiple users, repeat 4 and 5 until complete
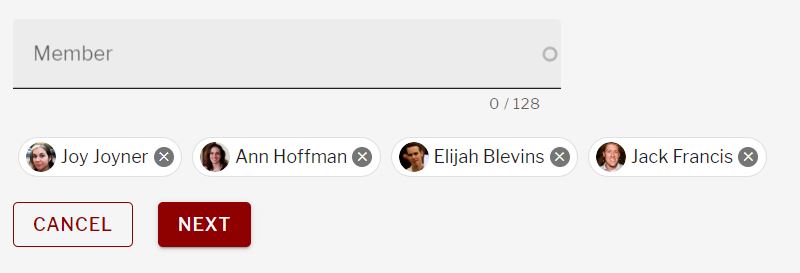
6. Select ‘Next’ and ‘Confirm’
7. Check that user or users have been added as members
8. Tick the box next to their name
9. In the dropdown labelled ‘Choose an Action’, select ‘Add Role(s)’

10. Select the appropriate role for your chosen user (you can select more than
11. Select ‘Next’, check the details and select ‘Confirm’
12. In the list of members check the correct role or roles have been added
13. Repeat steps 9 to 13 to establish your team once you have added everyone
Permissions and responsibilities
Find out what each publishing role is capable of doing in Invotra, below.
- Publishers: Create, change or edit content types related to a section. This includes content types that have been created or edited by others. Move content types between Workflow states.
- Editors: Review content types to confirm they’re well written, mistake-free and accurate. View content in a section. Edit content and change Workflow state to ‘Reviewed’.
- Authors: Create content types to be reviewed. Edit or delete own content, however they cannot review or publish content types. Useful if you have lots of contributors and want to control the quality of work before it is published.
Roles, state changes and automatic notifications
In Workflow, whenever a member of the publishing team changes the state of a content type to ‘Needs review’, ‘Reviewed’ or back to ‘Draft’ the appropriate member of that team is sent an email notification.
The following emails are sent to editors, publishers and reviewers:
- When content changes from ‘Draft’ to ‘Needs review’, the editor receives an email
- When content changes from ‘Needs review’ to ‘Reviewed’, the publisher receives an email
- When content changes back to ‘Draft’, the author receives an email
Defining the Workflow states
- Draft: Not visible to users and requires further work
- Needs review: Not visible to users and needs editor to review
- Reviewed: Not visible to users but editor has approved content. Publisher needs to review before choosing a template and changing state to ‘Published’
- Published: Visible to all users
- Unpublished: Not visible to users and no longer required
Scheduling with Workflow
When you are changing the state of a content type in Workflow, you can do so immediately or schedule a more appropriate date and time. For example, you can schedule a content type in a ‘Reviewed’ state to change to ‘Published’ at a precise moment in the future.
Adding a comment with Workflow
Comments are essential for your publishing team to communicate clearly to each other, as well as making sure the publishing process is totally traceable.
Whenever you update the workflow, add a comment and it will be logged in the ‘Workflow history’ alongside the date, the change of state, and the name of the commenter.
Publishing in confidence with revisions in Workflow
All content types with Workflow have revisions. This means when you edit your content and change its state, a revision is automatically saved containing the old content and a new, ‘Current revision’ is created.
If you ever need to refer back to an older version of your content type, go to ‘Revisions’ and select the appropriate option. Checking the date, time and username should help you locate the right revision.
0 Comments