Induction Progress Report – Setup Guide
New Starter Timeframe
- Navigate to ‘Administration‘ then select ‘New Starter Timeframe‘ (Admin/People & Teams)
- You will be redirected to the ‘New starter timeframe‘ screen
- Add the required tasks by giving the ‘Timeframe‘ a descriptive name, and set the relevant number of days or weeks.
- Select ‘save‘
New Users
- Navigate to ‘Administration‘ then select ‘User Management‘ (Admin/People & Teams)
- You will be redirected to the ‘User Management‘ screen
- Select ‘Add user’ and complete user name, email address, password, status and add any necessary roles.
- Select ‘Create New Account‘ and repeat to add more new users.
Task Checklist
- Navigate to a section of your choosing, as a ‘Webmaster‘ or ‘Section editor‘, edit the widget sections.
- Add a ‘Task Checklist widget‘
- Note: This is best placed at the bottom of the section to avoid damaging the layout for users who are not new and will not see the widget
- Give the ‘Task list‘ a title/name.
- More than one task can be added to this ‘tasklist‘. Each task will appear on the ‘Induction progress report‘ next to the tasklist it is added to.
- Set the widget to target ‘New starters‘ – see image

Task Checklist Target – New Starters
- Navigate back to the ‘New Starter Timeframe‘ to check tasks have appeared.
- ‘Timeframe‘ will appear – choose the necessary task set up previously in step 2 of ‘New starter timeframe‘.
- More tasks can be added to this task checklist by selecting the ‘ADD NEW TASK‘ button.

Induction Progress Reporting
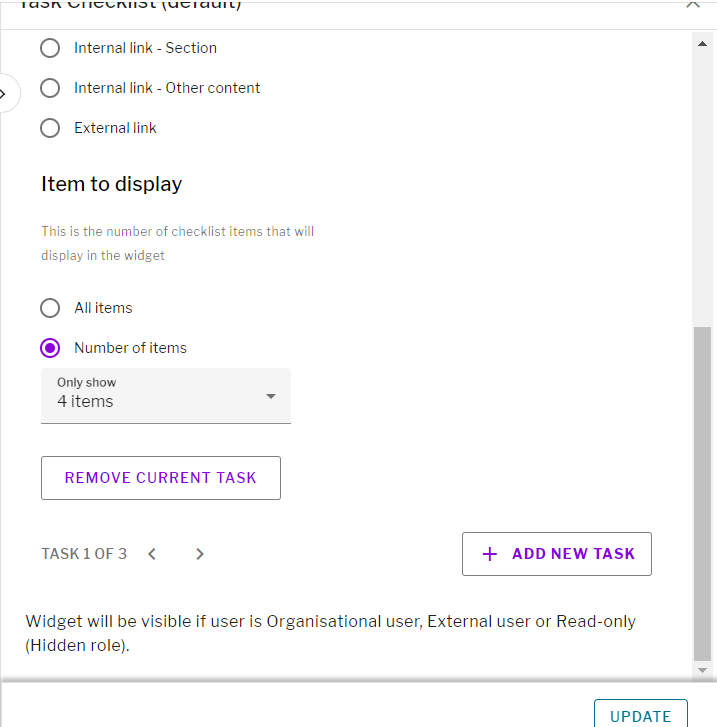
Task Checklist widget – Add New Task
- Navigate back to the ‘Task Checklist‘ widget
- Under display ‘do not’ select either the ‘progress bar’ or ‘wheel’.
- Copy the ‘Timeframe title‘ when asked to ‘Type a name for this task’.
- Select ‘Update‘ or ‘Save‘.