Bart Support
Navigation
Learn more about ‘Navigation‘ in ‘Adminstration‘
Site structure
Steps
- Navigate to the ‘Workbar’ and select the cog icon (Administration)
- You will be directed to the ‘Administration’ screen
- Select the ‘Navigation‘ tab dropdown then the ‘Site Structure’ tab
- You will be redirected to the ‘Site Structure‘ home screen
- To add a new menu item select the ‘Create Menu Item‘ button
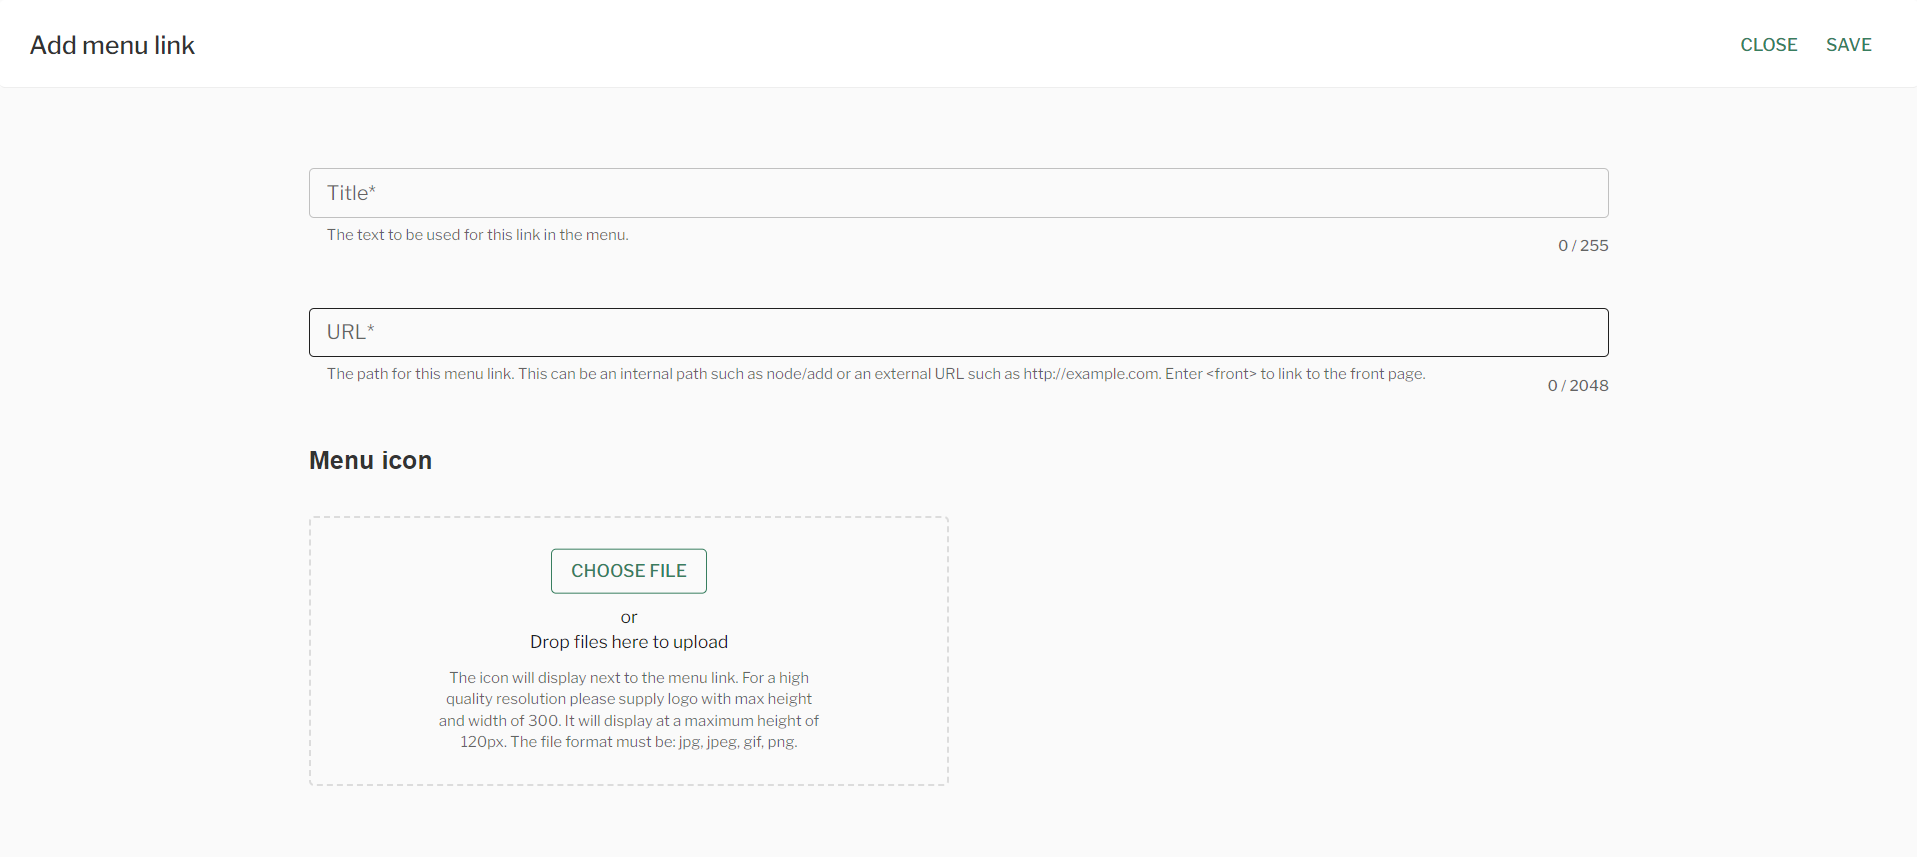
- Input the ‘Title‘ & ‘Description‘
- Select the checkbox if you want to include a ‘Landing page‘ & then ‘Display Menu‘
- Fill in the relevant information on the ‘RHD‘ (Right Hand Drawer)
- Select ‘Save‘

Create Menu Item
- Select the ‘Three dots‘ in the actions column in order to:
- Create a ‘Submenu item‘ for that ‘Menu item‘
- ‘Edit‘
- ‘Delete‘
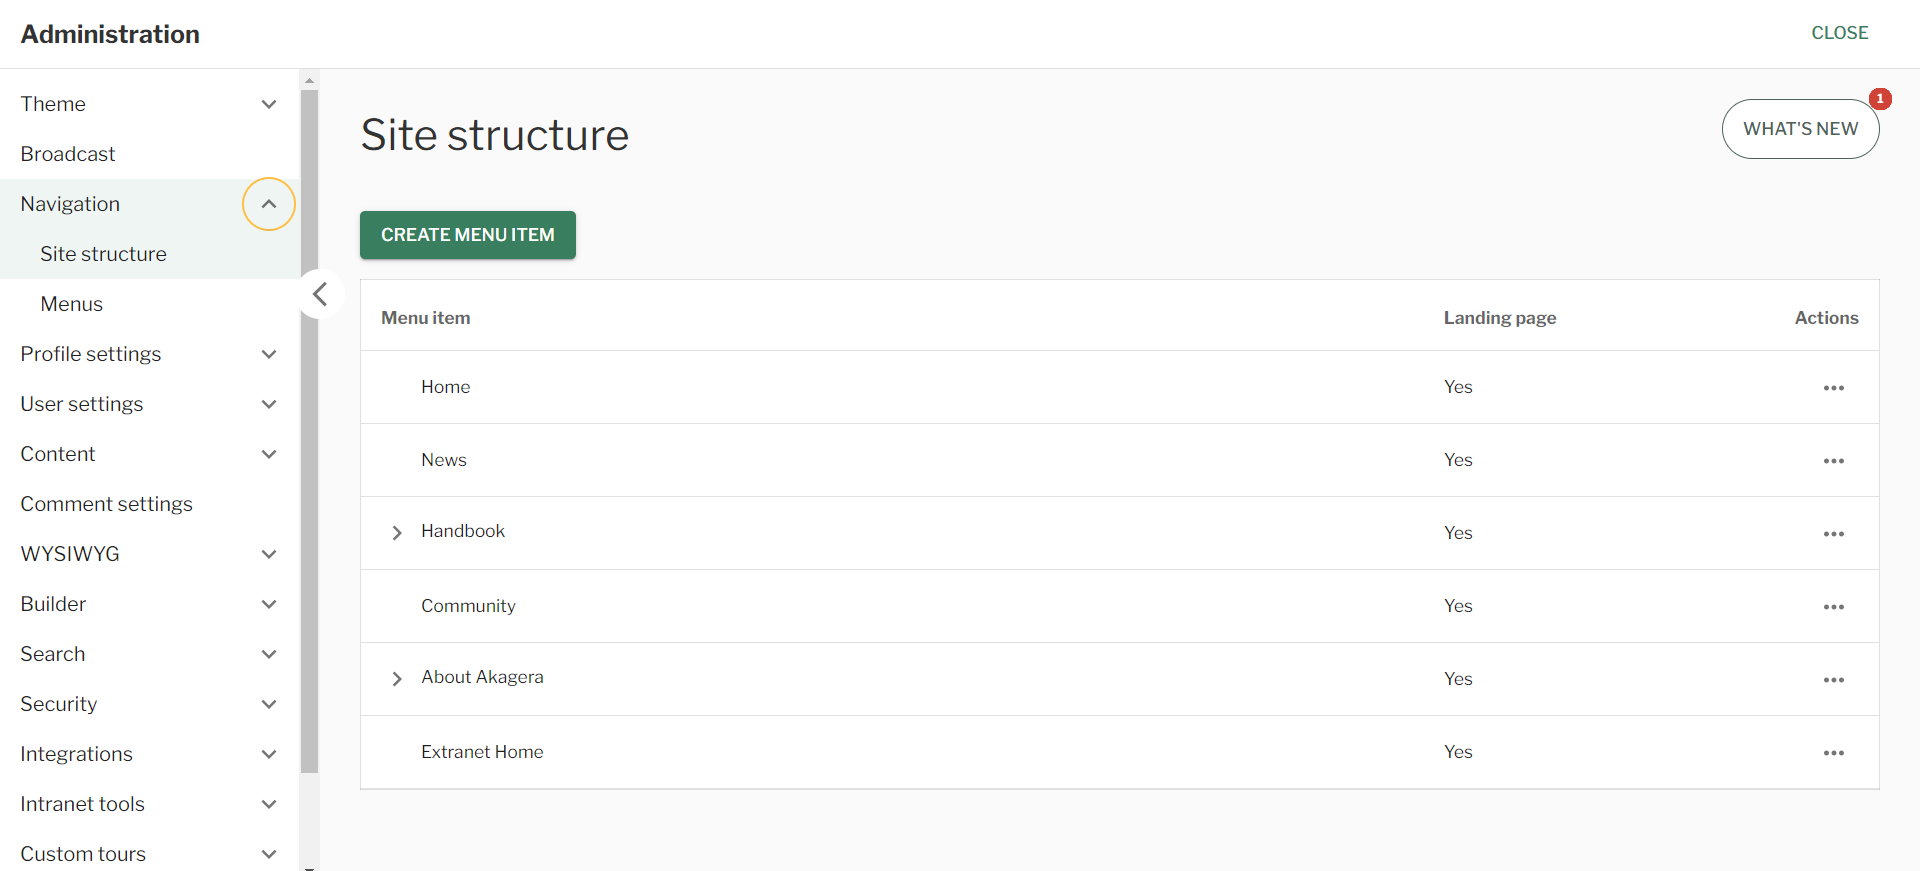
Navigation – Site Structure
Menus
Apps menu
Steps
- Navigate to the ‘Workbar’ and select the cog icon (Administration)
- You will be directed to the ‘Administration’ screen
- Select the ‘Navigation‘ tab dropdown then the ‘Menus’ tab
- Select the “Workbar” tab
- To add a “Menu Link” select the “Add Menu Link” button
- Input a ‘Title‘, ‘URL‘ and add a ‘Menu Icon‘
- Select ‘Save‘
Add Menu Link – Apps Menu
- To enable icons select the checkbox “Enable icons for menus”
- To reorder the “Link Titles” select and move the “Drag handles” on the left hand side
- To enable the “Link Title” to be visible in the “App Menu” select the checkbox to the right of the specific “Link Title”.
- In order to edit a “Link Title” select the ‘Option menu’ (three dots) to the right of it.
- Select ‘Save‘
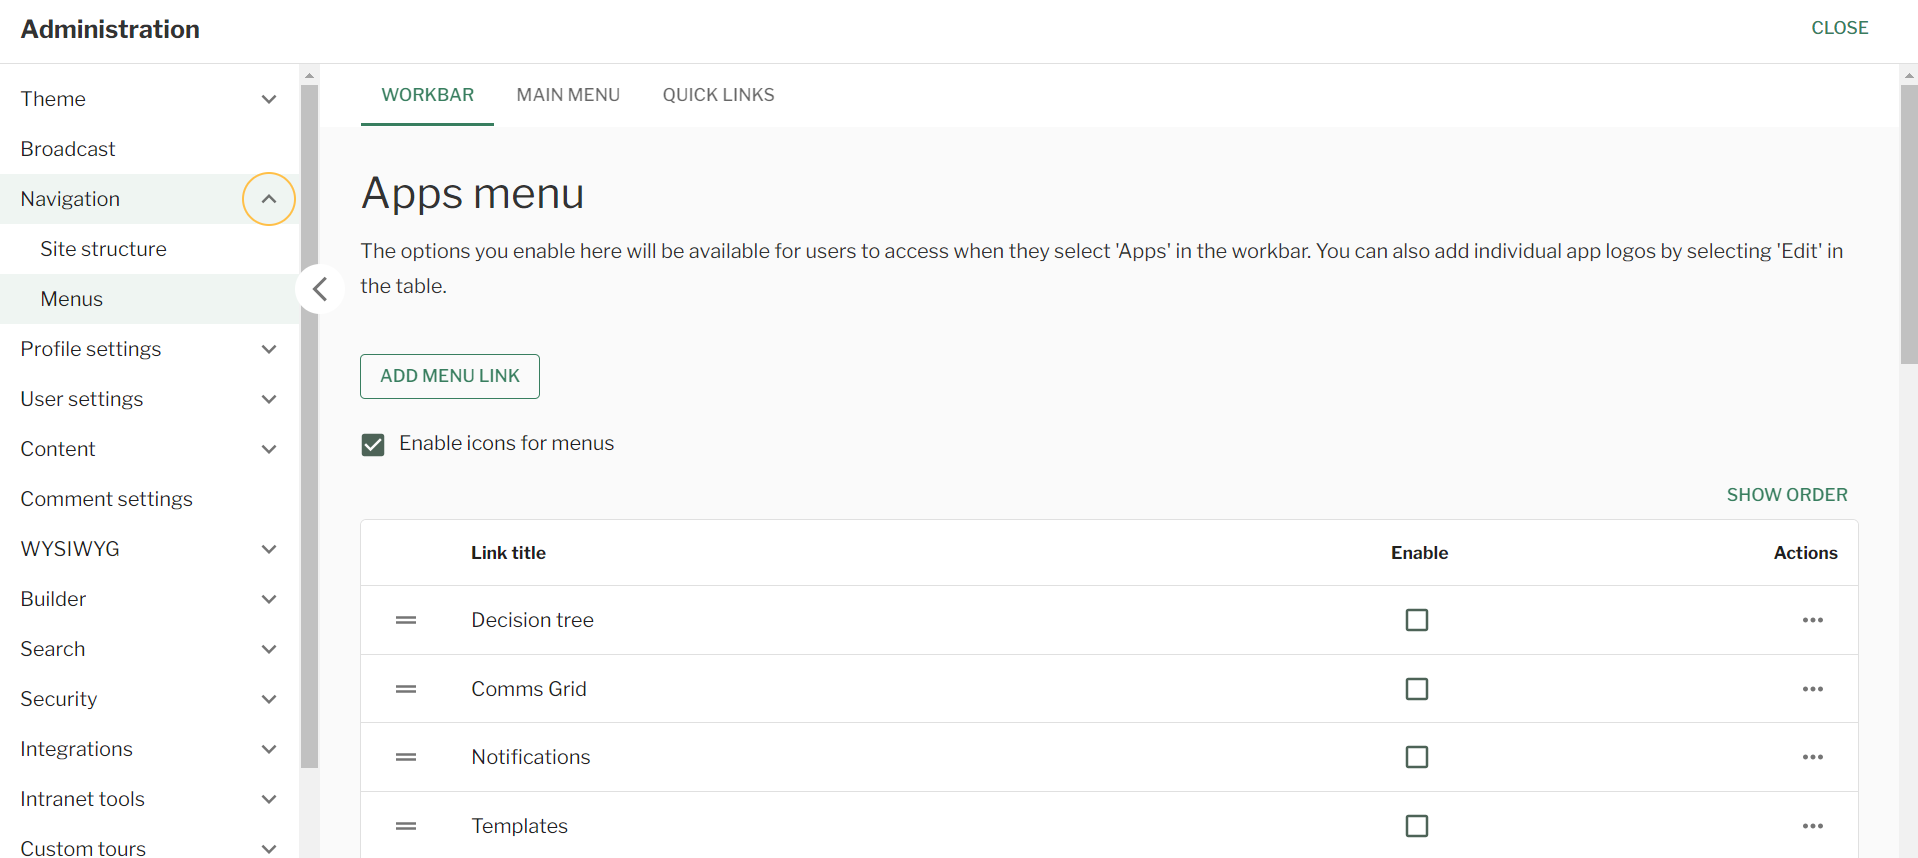
Navigation – Apps menu
Main menu
Steps
- Navigate to the ‘Workbar’ and select the cog icon (Administration)
- You will be directed to the ‘Administration’ screen
- Select the ‘Navigation’ dropdown
- Select “Menus”
- You will be redirected to the ‘Menus‘ screens
- Select the ‘Main Menu‘ tab
- Select whether to show the ‘Main Menu‘
- ‘Horizontal‘
- ‘Drawer‘
- If you want to “Pin the main menu to the Workbar” select the checkbox
- Input the number of “Submenu items” you want the menu to go
- Select “Save”
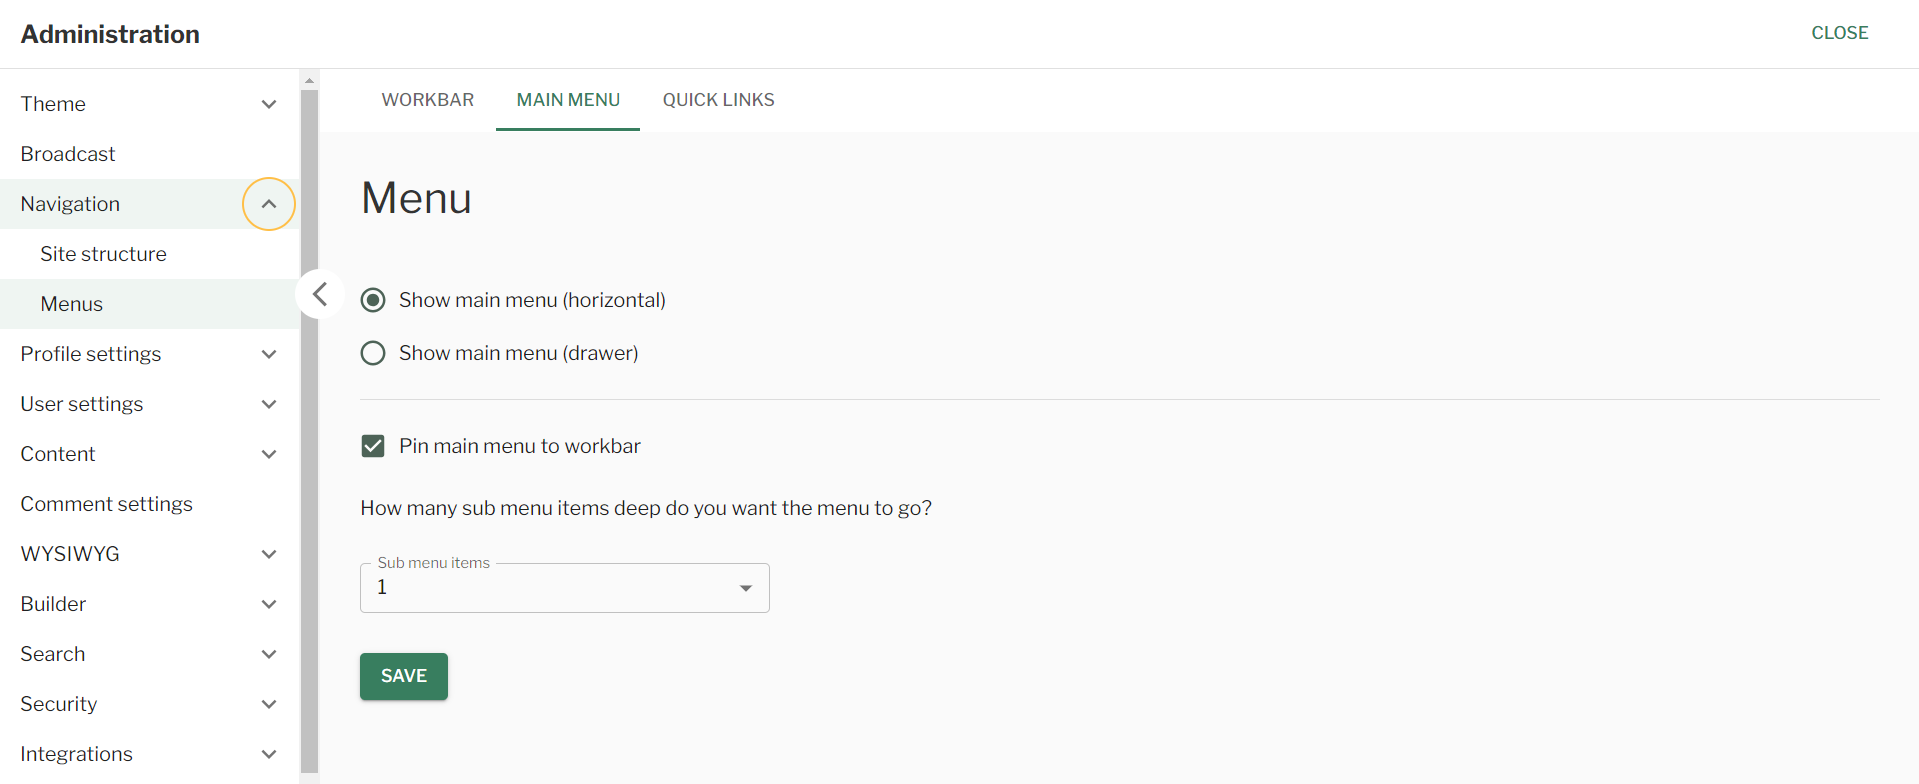
Navigation – Main Menu
Quick links
Steps
- Navigate to the ‘Workbar’ and select the cog icon (Administration)
- You will be directed to the ‘Administration’ screen
- Select the ‘Navigation’ dropdown
- Select “Menus”
- You will be redirected to the ‘Menus‘ screens
- Select the “Quick links tab”
- To add a “Quick Link” select the “Add Quick Link” button
- Input the ‘Menu Item Title‘
- Input the ‘URL‘
- Input the ‘Description‘
- Select the relevant ‘Checkboxes‘
- Add the ‘Parent link‘ and ‘Order‘

Add quick link – Quick Links
- To reorder the “Link Titles” select and move the “Drag handles” on the left hand side
- To enable an “Quick Link” on a specific “Link Title” select the checkbox in the “Enable” coloumn.
- In order to ‘Edit‘ or ‘Delete‘ a “Link Title” select the ‘Option menu’ (three dots) to the right of it.
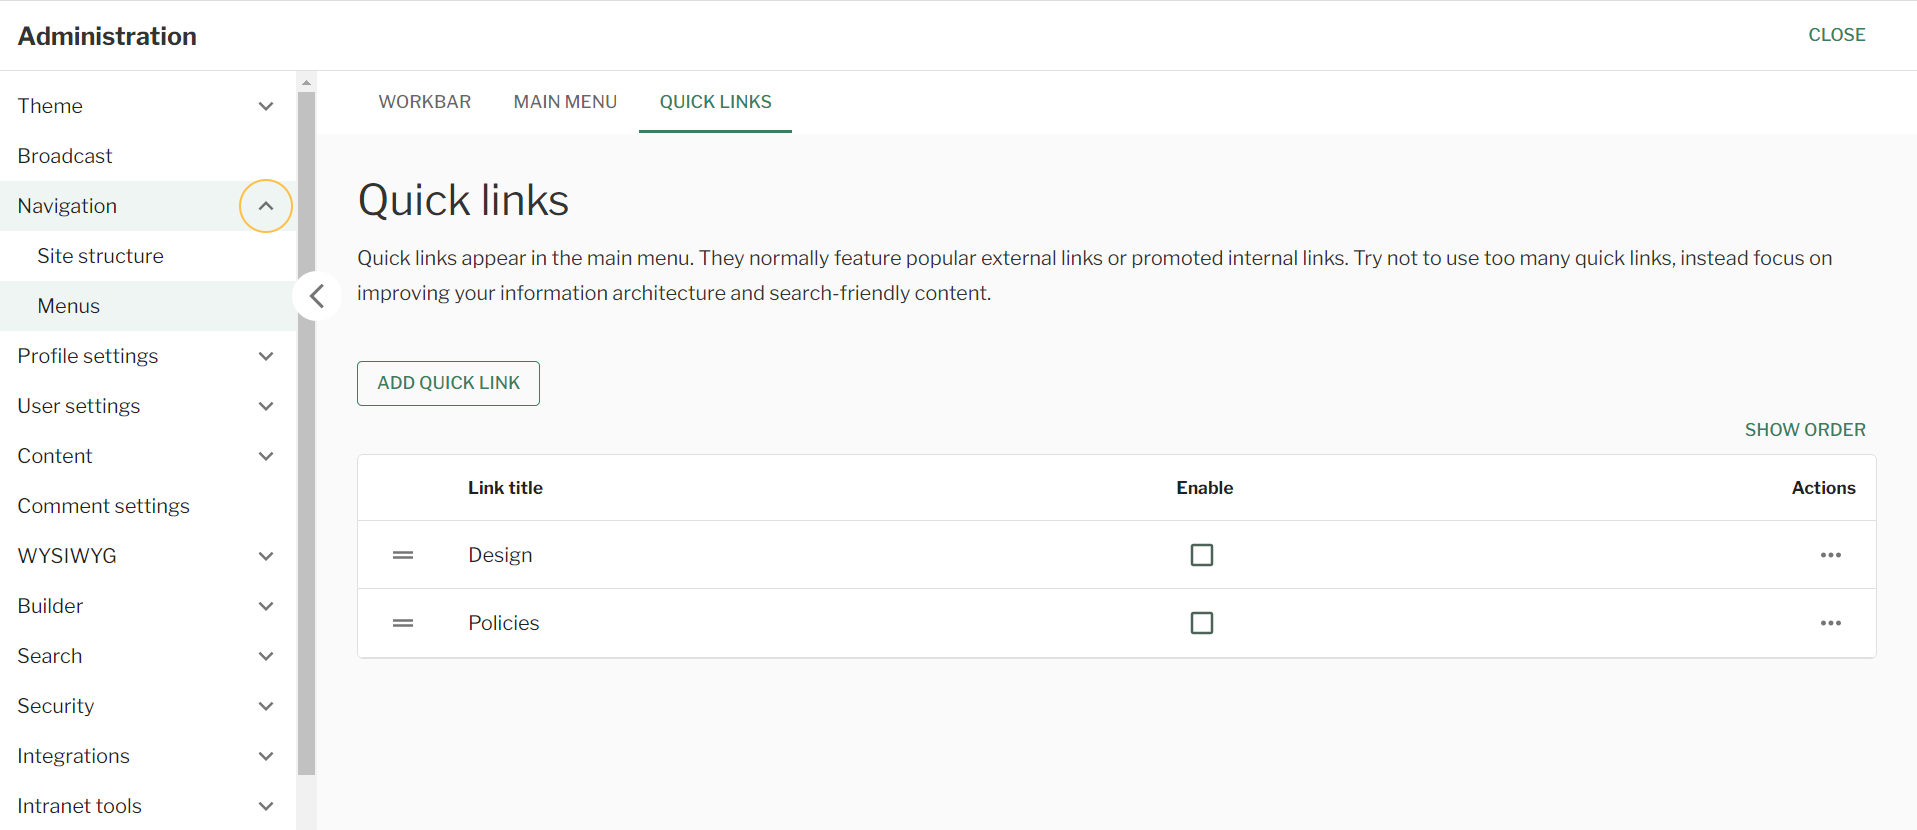
Navigation – Quick Links
Couldn't find what you're looking for?
We're here to help. Please raise a support request via our help desk and we'll get back to you asap