
Content
Learn more about ‘Content‘ in ‘Adminstration‘
Tags, topics and categories
General Topics
Steps
- Navigate to the ‘Workbar’ and select the cog icon (Administration)
- You will be directed to the ‘Administration Screen’
- Select the ‘Content settings‘ dropdown
- Here you will be presented with ‘Tags, Topics & Categories‘ page
- Select ‘Add General Topic‘
- Input a ‘Title’ & ‘Description‘
- Select the relevant publishing options ‘Published‘ or ‘Archive‘
- To ‘Edit‘ or ‘Delete‘ select the ‘Three dots‘ to the right in the Actions column
- To rearrange the order select and drag the ‘Two lines‘ to the left of the title
- Select ‘Save‘

Content – Tags, Topics & Categories – General Topics
Content Categories
Steps
- Navigate to the ‘Workbar’ and select the cog icon (Administration)
- You will be directed to the ‘Administration Screen’
- Select the ‘Content settings‘ dropdown
- Here you will be presented with ‘Tags, Topics & Categories‘ page
- Select the ‘Content Categories‘ tab
- Select ‘Add Content Category‘
- Input a ‘Title’ & ‘Description‘
- Select the relevant publishing options ‘Published‘ or ‘Archive‘
- To ‘Edit‘ or ‘Delete‘ select the ‘Three dots‘ to the right in the Actions column
- To rearrange the order select and drag the ‘Two lines‘ to the left of the title
- Select ‘Save‘

Content – Tags, Topics & Categories – Content Categories
Policy types
Steps
- Navigate to the ‘Workbar’ and select the cog icon (Administration)
- You will be directed to the ‘Administration Screen’
- Select the ‘Content settings‘ dropdown
- Here you will be presented with ‘Tags, Topics & Categories‘ page
- Select the ‘Policy Types‘ tab
- Select ‘Add Policy Type‘
- Input a ‘Title’ & ‘Description‘
- Select the relevant publishing options ‘Published‘ or ‘Archive‘
- To ‘Edit‘ or ‘Delete‘ select the ‘Three dots‘ to the right in the Actions column
- To rearrange the order select and drag the ‘Two lines‘ to the left of the title
- Select ‘Save‘

Content – Tags, Topics & Categories – Policy Types
Primary categories
Steps
- Navigate to the ‘Workbar’ and select the cog icon (Administration)
- You will be directed to the ‘Administration Screen’
- Select the ‘Content settings‘ dropdown
- Here you will be presented with ‘Tags, Topics & Categories‘ page
- Select the ‘Primary Categories‘ tab
- Select ‘Add Primary Category‘
- Input a ‘Title’ & ‘Description‘
- Select the relevant publishing options ‘Published‘ or ‘Archive‘
- To ‘Edit‘ or ‘Delete‘ select the ‘Three dots‘ to the right in the Actions column
- To rearrange the order select and drag the ‘Two lines‘ to the left of the title
- Select ‘Save‘

Content Settings – Tags, Topics & Categories – Primary Categories
Projects
Steps
- Navigate to the ‘Workbar’ and select the cog icon (Administration)
- You will be directed to the ‘Administration Screen’
- Select the ‘Content settings‘ dropdown
- Here you will be presented with ‘Tags, Topics & Categories‘ page
- Select the ‘Projects‘ tab
- Select ‘Add Project‘
- Input a ‘Title’ & ‘Description‘
- Select the relevant publishing options ‘Published‘ or ‘Archive‘
- To ‘Edit‘ or ‘Delete‘ select the ‘Three dots‘ to the right in the Actions column
- To rearrange the order select and drag the ‘Two lines‘ to the left of the title
- Select ‘Save‘

Content – Tags, Topics & Categories – Projects
Security Classifications
Steps
- Navigate to the ‘Workbar’ and select the cog icon (Administration)
- You will be directed to the ‘Administration Screen’
- Select the ‘Content settings‘ dropdown
- Here you will be presented with ‘Tags, Topics & Categories‘ page
- Select the ‘Security Classifications‘ tab
- Select ‘Add Security Classification‘
- Input a ‘Title’ & ‘Description‘
- Select the relevant publishing options ‘Published‘ or ‘Archive‘
- To ‘Edit‘ or ‘Delete‘ select the ‘Three dots‘ to the right in the Actions column
- To rearrange the order select and drag the ‘Two lines‘ to the left of the title
- Select ‘Save‘

Content – Tags, Topics & Categories – Security Classifications
Title limit
Steps
- Navigate to the ‘Workbar’ and select the cog icon (Administration)
- You will be directed to the ‘Administration Screen’
- Select the ‘Content settings‘ dropdown
- Select the ‘Title Limit‘ tab
- Select the ‘Dropdown‘ arrow of the relevant ‘Title‘
- Input the limit of ‘Characters‘ for the ‘Title‘
- Located at the bottom select the ‘Save‘ button

Admin – Content – Title limit
Must reassign content
Steps
- Navigate to the ‘Workbar’ and select the cog icon (Administration)
- You will be directed to the ‘Administration Screen’
- Select the ‘Content settings‘ dropdown
- Select the ‘Must Reassign Content‘ tab
- Select the ‘Checkbox‘ of the ‘Content type‘ you would like to ‘Reassign‘
- Select ‘Save‘

Content Settings – Must Reassign Content
Custom content types
Steps
- Navigate to the ‘Workbar’ and select the cog icon (Administration)
- You will be directed to the ‘Administration Screen’
- Select the ‘Content settings‘ dropdown
- Select the ‘Custom Content Types‘ tab
- Select ‘Add Custom Content Type‘
- Input the ‘Title’ and ‘Description’
- Add the ‘Owner‘, ‘Icon‘ and ‘Publishing‘ options
- Input the relevant ‘Configuration‘ options
- Select ‘Save‘
- To ‘Edit‘ or ‘Delete‘ a ‘Custom Content Type‘ select the ‘Three dots‘ to the right of the item
- Select ‘Save‘
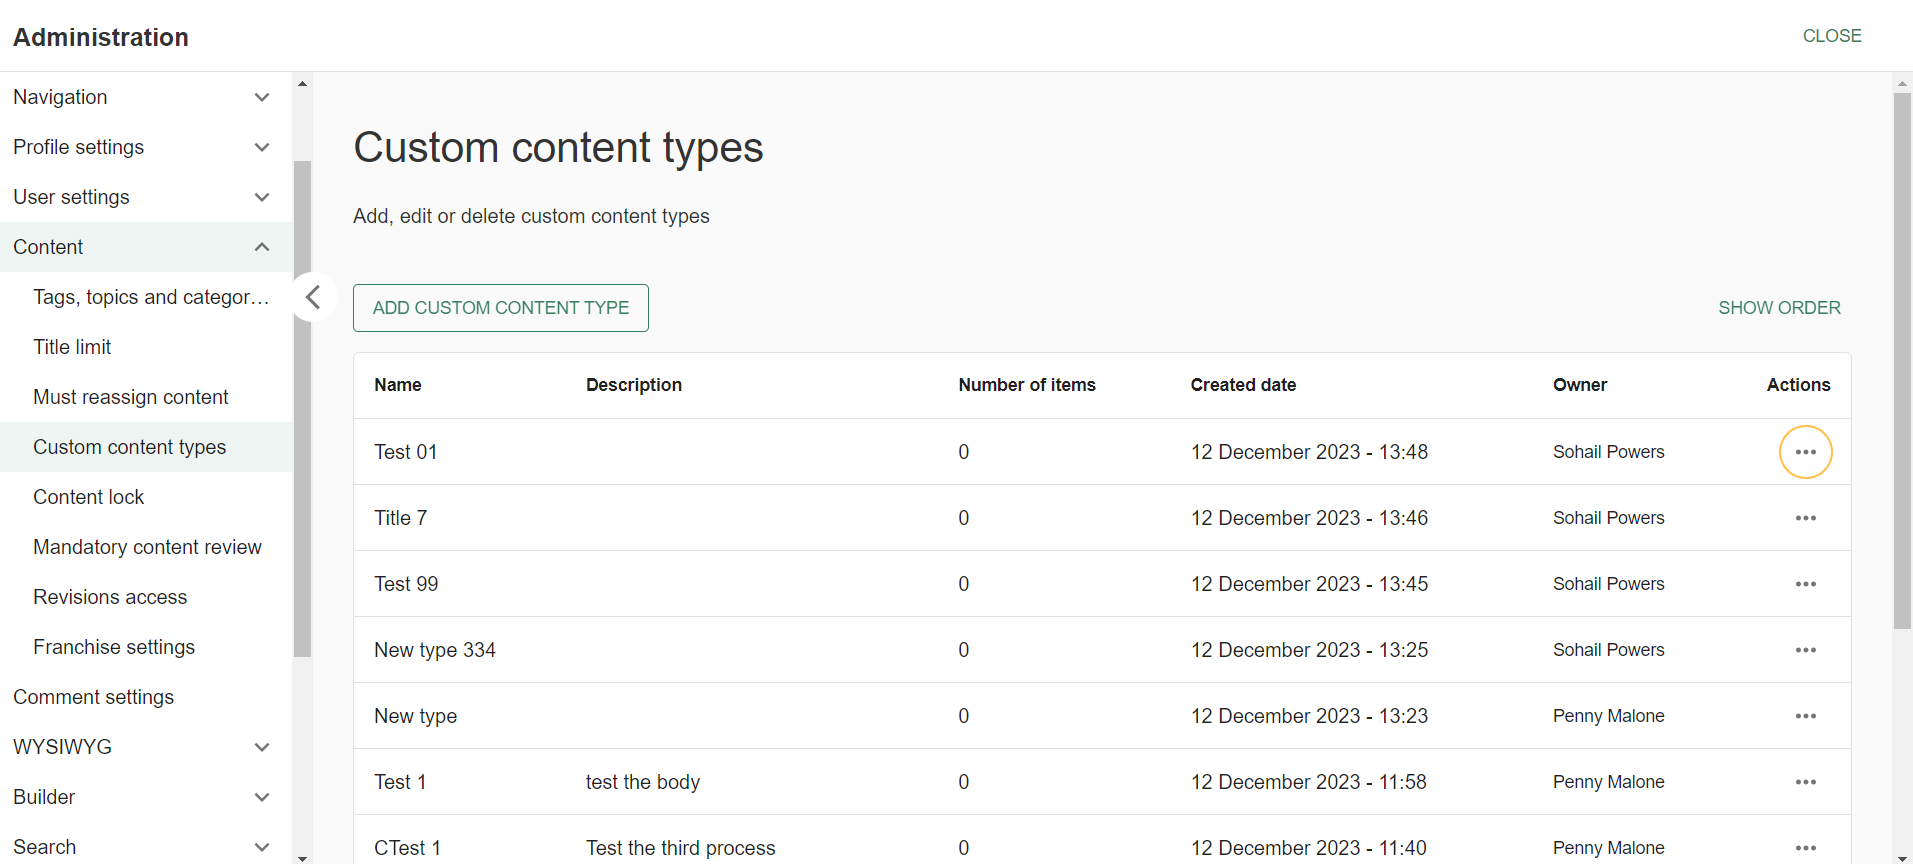
Administration – Custom Content Types
Content lock
Steps
- Navigate to the ‘Workbar’ and select the cog icon (Administration)
- You will be directed to the ‘Administration Screen’
- Select the ‘Content settings‘ dropdown
- Select the ‘Content Lock‘ tab
- Select the ‘Checkbox‘ next to the ‘Content type‘ that you would like to ‘Lock‘
- Select ‘Save‘

Administration – Content – Content Lock
Mandatory content review
Steps
- Navigate to the ‘Workbar’ and select the cog icon (Administration)
- You will be directed to the ‘Administration Screen’
- Select the ‘Content settings‘ dropdown
- Select the ‘Mandatory Content Review‘ tab
- Select the ‘Checkbox‘ of the ‘Content type‘ you would like to have a ‘Mandatory Review‘
- Select ‘Save‘
Revisions access
Steps
- Navigate to the ‘Workbar’ and select the cog icon (Administration)
- You will be directed to the ‘Administration Screen’
- Select the ‘Content settings‘ dropdown
- Select the ‘Revisions Access‘ tab
- Select the ‘Checkbox‘ in the ‘Access‘ column next to the ‘Content type‘ of your choice
- Select ‘Save‘

Administration – Revisions access
Couldn't find what you're looking for?
We're here to help. Please raise a support request via our help desk and we'll get back to you asap
Page content