Profile settings
Learn more about ‘Profile settings‘ in ‘Adminstration‘
Roles, skills and interests
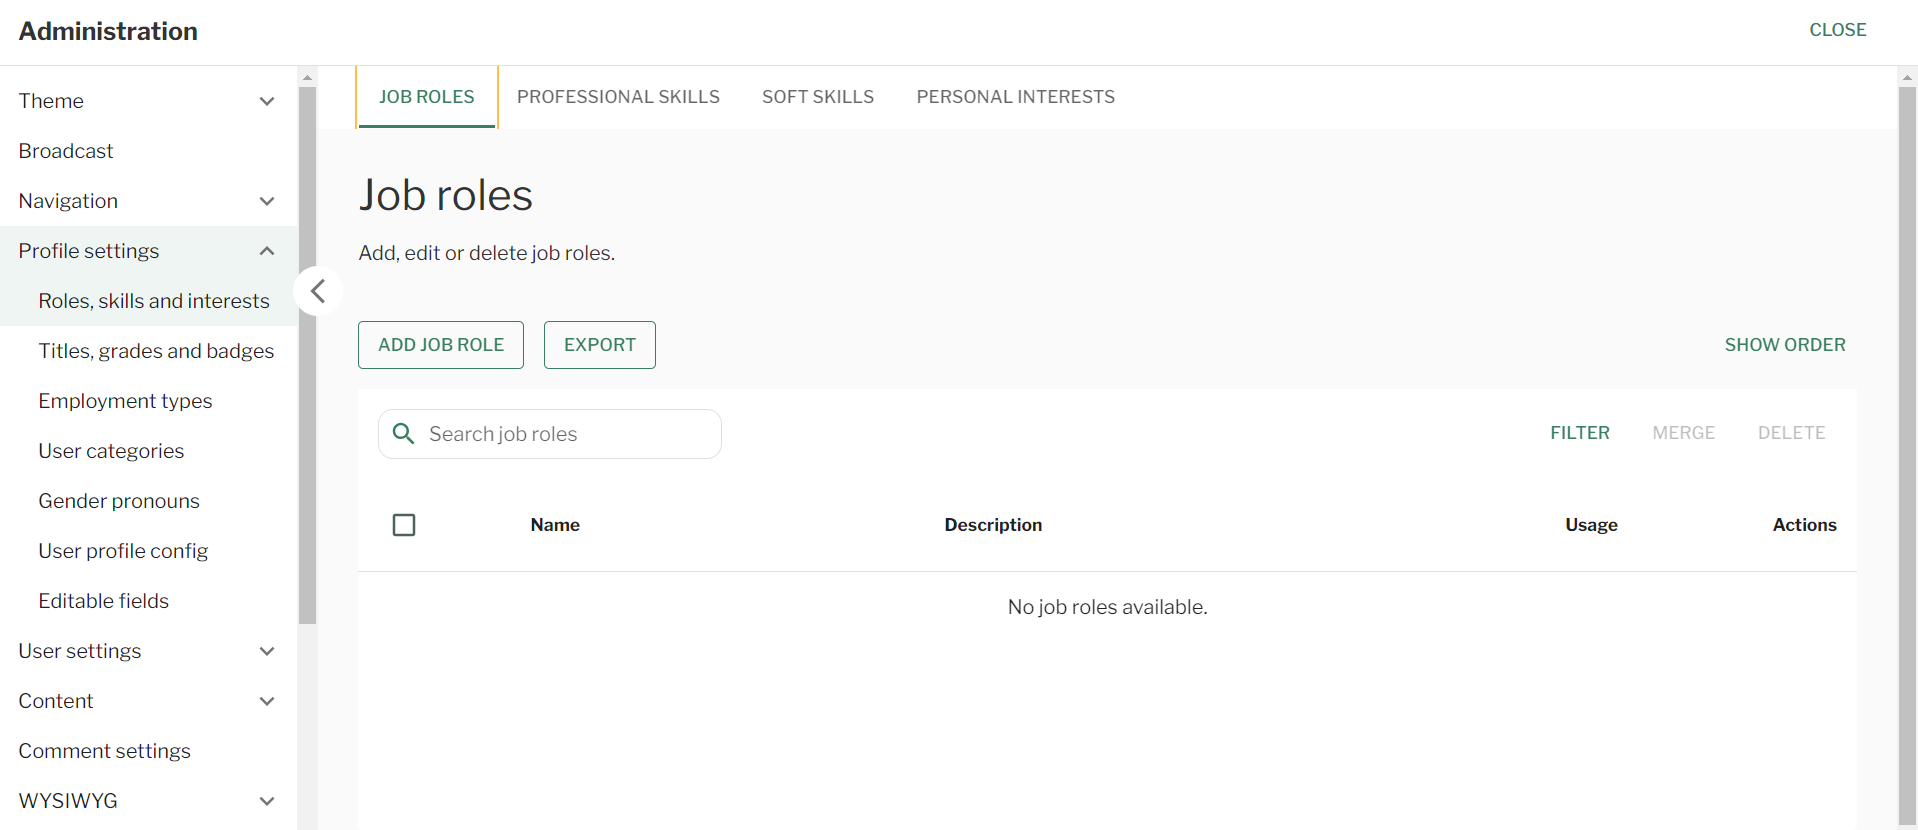
Job roles
Steps
- Navigate to the ‘Workbar’ and select the cog icon (Administration)
- You will be directed to the ‘Administration Screen’
- Select the ‘Profile settings‘ dropdown
- Select the ‘Roles, Skills and interest‘ tab
- Here you will be redirected to the ‘Job Roles‘ page in the ‘Roles, Skills and interest‘ tab.
- Select ‘Add Job Role‘
- Input ‘Title‘ & ‘Description’
- Select the ‘Publishing Options‘ either ‘Published‘ or ‘Archive‘
- Select ‘Export‘ in order to ‘Export‘ the job roles
- Use the ‘Search bar‘ to search for the different job roles
- Select ‘Filter‘ in order to ‘Filter‘ between ‘All‘, ‘Unassigned‘ & ‘Assigned roles‘
- To ‘Merge‘ the job roles select the ‘checkbox‘ next to multiple then the ‘Merge‘ button
- To ‘Delete‘ either select the ‘Delete‘ button to delete all job roles or select the ‘Checkbox‘ next to the job roles of your choice then select the ‘Delete‘ button
- Alternatively select the ‘Three dots‘ to the right of the Job title then ‘Delete‘
- To ‘Edit‘ select the ‘Three dots‘ to the right of the Job title
- To reorder the ‘Job Roles‘ drag the ‘Two lines‘ to the left of the Job title
- Select ‘Save‘
Profile Settings – Roles, Skills & Interests – Job roles
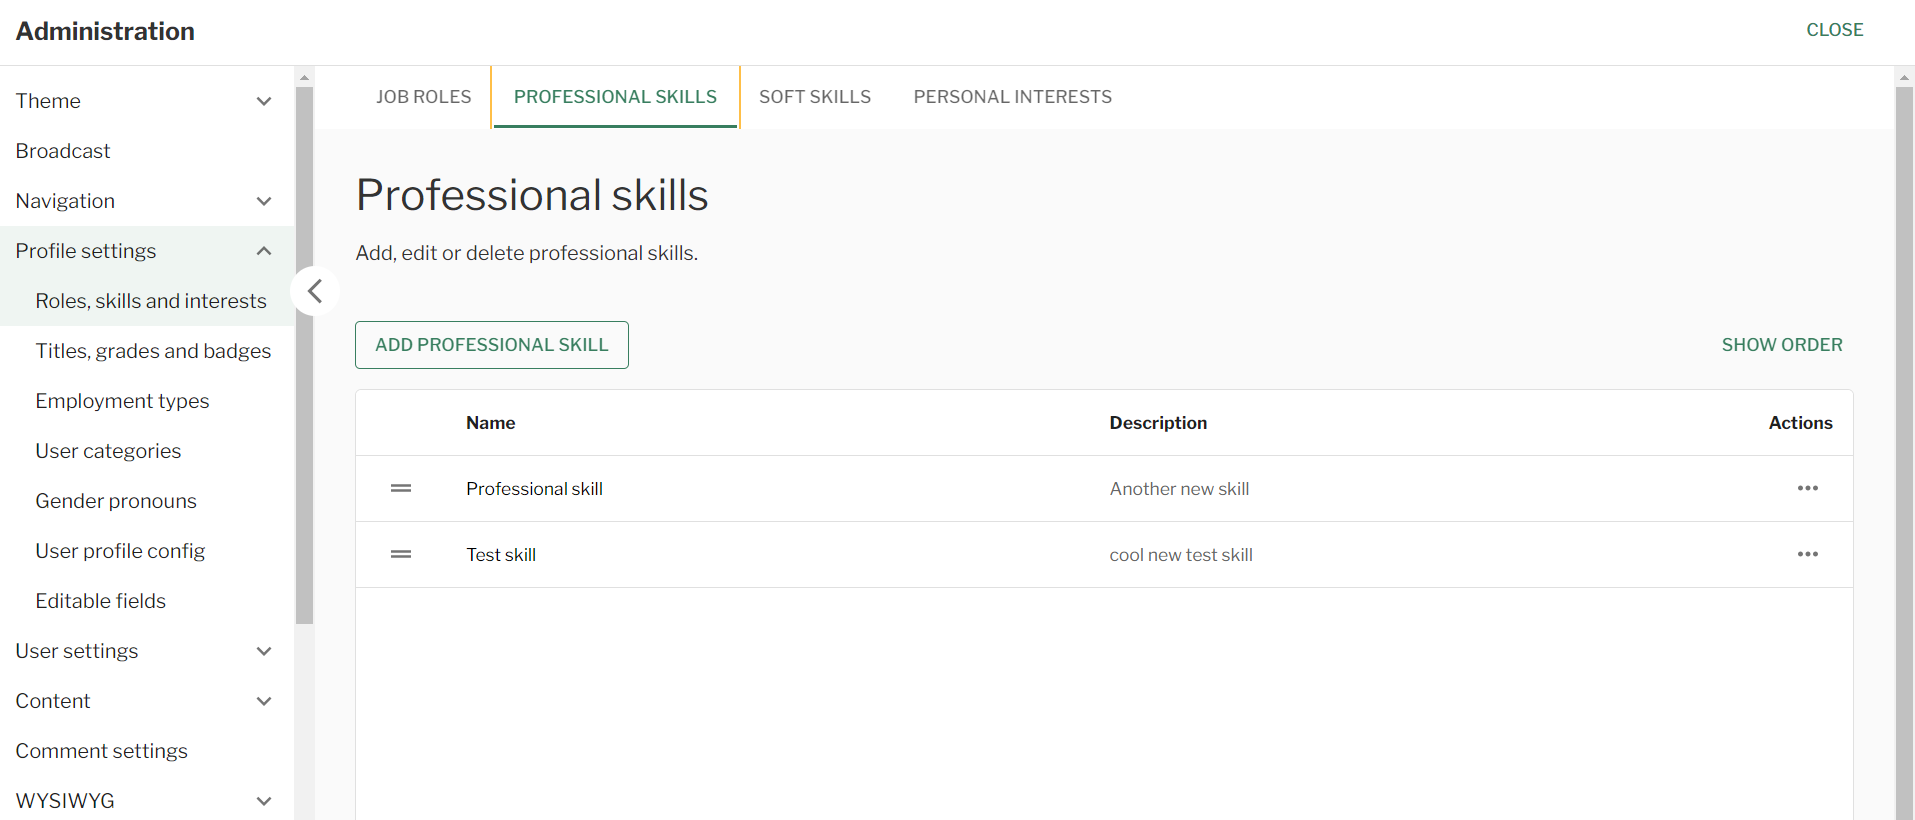
Professional skills
Steps
- Navigate to the ‘Workbar’ and select the cog icon (Administration)
- You will be directed to the ‘Administration Screen’
- Select the ‘Profile settings‘ dropdown
- Select the ‘Roles, Skills and interest‘ tab
- Then select the ‘Professional Skills‘ tab
- Select ‘Add Professional Skill‘
- Input ‘Title‘ & ‘Description’
- Select the ‘Publishing Options‘ either ‘Published‘ or ‘Archive‘
- To reorder the ‘Professional Skills‘ drag the ‘Two lines‘ to the left of the skill
- To ‘Edit‘ or ‘Delete‘ the ‘Professional Skill‘ select the ‘Three dots‘ to the right of the skill
- Select ‘Save‘
Profile Settings – Roles, Skills & Interests – Professional skills
Soft skills
Steps
- Navigate to the ‘Workbar’ and select the cog icon (Administration)
- You will be directed to the ‘Administration Screen’
- Select the ‘Profile settings‘ dropdown
- Select the ‘Roles, Skills and interest‘ tab
- Then select the ‘Soft Skills‘ tab
- Select ‘Add Soft Skill‘
- Input ‘Title‘ & ‘Description’
- Select the ‘Publishing Options‘ either ‘Published‘ or ‘Archive‘
- To reorder the ‘Soft Skills‘ drag the ‘Two lines‘ to the left of the skill
- To ‘Edit‘ or ‘Delete‘ the ‘Professional Skill‘ select the ‘Three dots‘ to the right of the skill
- Select ‘Save‘

Profile Settings – Roles, Skills & Interests – Soft Skills
Personal interests
Steps
- Navigate to the ‘Workbar’ and select the cog icon (Administration)
- You will be directed to the ‘Administration Screen’
- Select the ‘Profile settings‘ dropdown
- Select the ‘Roles, Skills and interest‘ tab
- Then select the ‘Personal Interests‘ tab
- Select ‘Add Personal Interest‘
- Input ‘Title‘ & ‘Description’
- Select the ‘Publishing Options‘ either ‘Published‘ or ‘Archive‘
- To reorder the ‘Personal Interest‘ drag the ‘Two lines‘ to the left of the personal interest
- To ‘Edit‘ or ‘Delete‘ the ‘Personal Interest‘ select the ‘Three dots‘ to the right of the personal interest
- Select ‘Save‘

Profile Settings – Roles, Skills & Interests – Personal Interests
Titles, grades and badges
Titles
Steps
- Navigate to the ‘Workbar’ and select the cog icon (Administration)
- You will be directed to the ‘Administration Screen’
- Select the ‘Profile settings‘ dropdown
- Select the ‘Titles, Grades & Badges‘ tab
- Then select the ‘Titles‘ tab
- Select ‘Add Title‘
- Input ‘Title‘ & ‘Description’
- Select the ‘Publishing Options‘ either ‘Published‘ or ‘Archive‘
- To reorder the ‘Title‘ drag the ‘Two lines‘ to the left of the title
- To ‘Edit‘ or ‘Delete‘ the ‘Title‘ select the ‘Three dots‘ to the right of the title
- Select ‘Save‘

Profile Settings – Titles, Grades & Badges – Titles
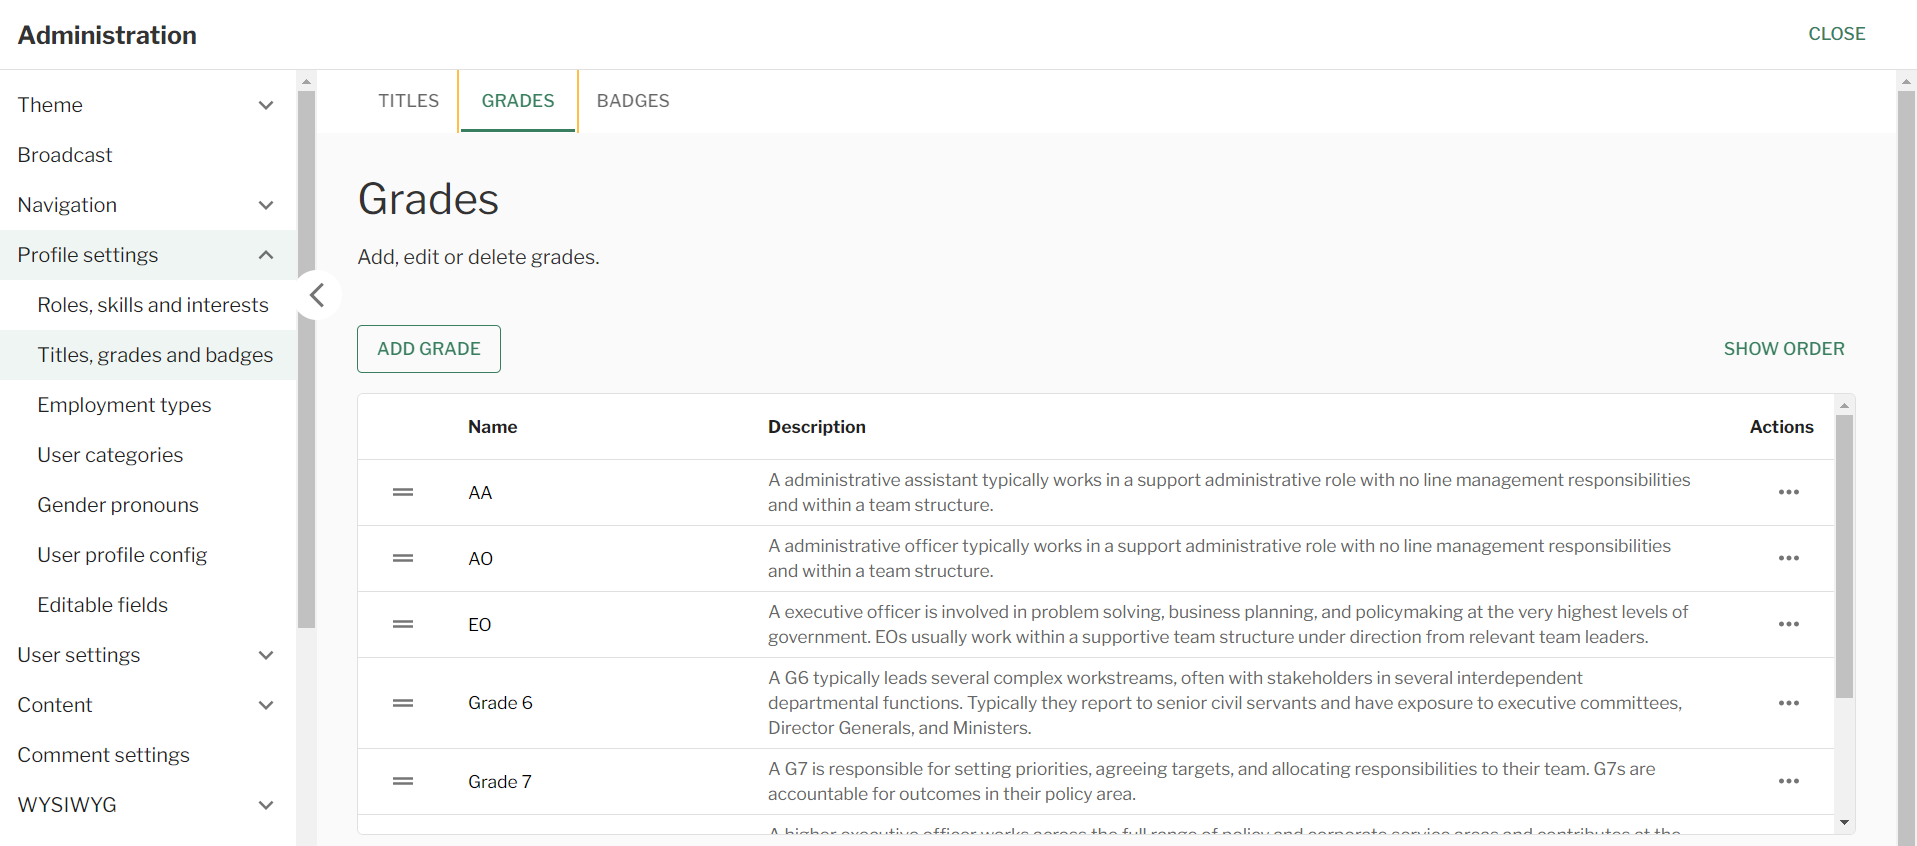
Grades
Steps
- Navigate to the ‘Workbar’ and select the cog icon (Administration)
- You will be directed to the ‘Administration Screen’
- Select the ‘Profile settings‘ dropdown
- Select the ‘Titles, Grades & Badges‘ tab
- Then select the ‘Grades‘ tab
- Select ‘Add Grade‘
- Input ‘Title‘ & ‘Description’
- Select the ‘Publishing Options‘ either ‘Published‘ or ‘Archive‘
- To reorder the ‘Grade‘ drag the ‘Two lines‘ to the left of the grade
- To ‘Edit‘ or ‘Delete‘ the ‘Grade‘ select the ‘Three dots‘ to the right of the grade
- Select ‘Save‘
Profile Settings – Titles, Grades & Badges – Grades
Badges
Steps
- Navigate to the ‘Workbar’ and select the cog icon (Administration)
- You will be directed to the ‘Administration Screen’
- Select the ‘Profile settings‘ dropdown
- Select the ‘Titles, Grades & Badges‘ tab
- Then select the ‘Badges‘ tab
- Select ‘Add Badge‘
- Input ‘Title‘ & ‘Description’
- Select the ‘Publishing Options‘ either ‘Published‘ or ‘Archive‘
- To reorder the ‘Badge‘ drag the ‘Two lines‘ to the left of the badge
- To ‘Edit‘ or ‘Delete‘ the ‘Badge‘ select the ‘Three dots‘ to the right of the badge
- Select ‘Save‘

Profile Settings – Titles, Grades & Badges – Badges
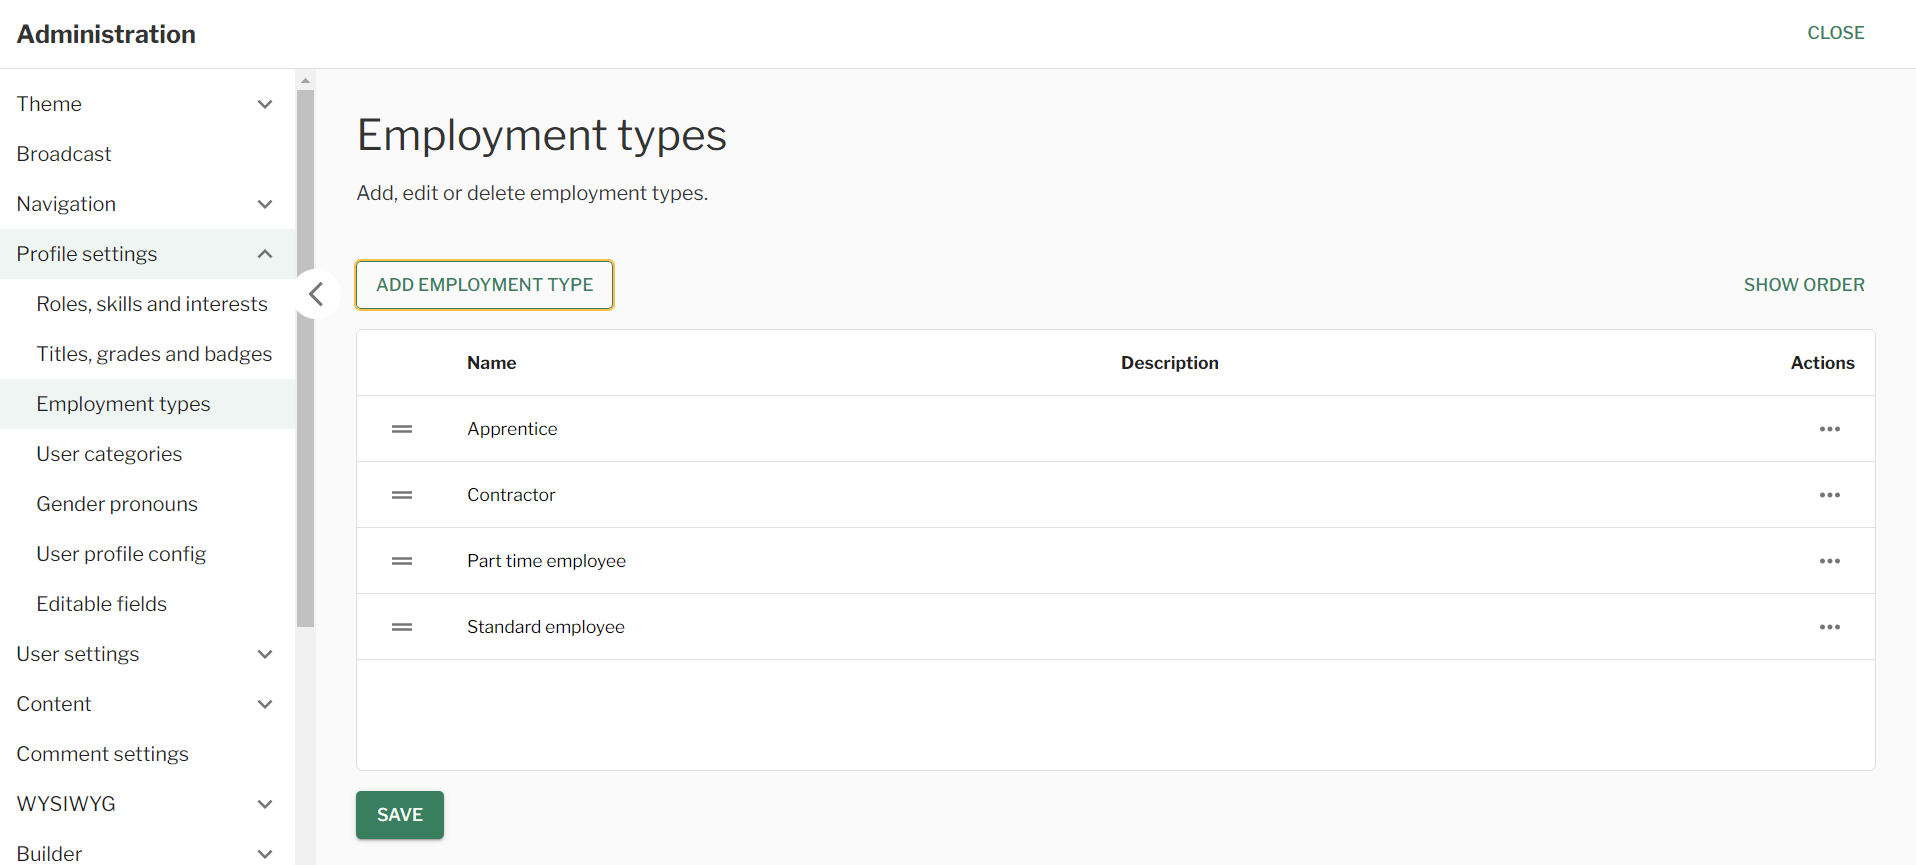
Employment types
Steps
- Navigate to the ‘Workbar’ and select the cog icon (Administration)
- You will be directed to the ‘Administration Screen’
- Select the ‘Profile settings‘ dropdown
- Select the ‘Employment Types‘ tab
- You will be redirected to the ‘Employment Types‘ page
- Select ‘Add Employment Type‘
- Input ‘Title‘ & ‘Description’
- Select the ‘Publishing Options‘ either ‘Published‘ or ‘Archive‘
- To reorder the ‘Employment Type‘ drag the ‘Two lines‘ to the left of the employment type
- To ‘Edit‘ or ‘Delete‘ the ‘Employment Type‘ select the ‘Three dots‘ to the right of the employment type
- Select ‘Save‘
Profile Settings – Employment Types
User categories
Steps
- Navigate to the ‘Workbar’ and select the cog icon (Administration)
- You will be directed to the ‘Administration Screen’
- Select the ‘Profile settings‘ dropdown
- Select the ‘User Categories‘ tab
- You will be redirected to the ‘User Categories‘ page
- Select ‘Add User Categories‘
- Input ‘Title‘ & ‘Description’
- Select the ‘Publishing Options‘ either ‘Published‘ or ‘Archive‘
- To reorder the ‘User Category‘ drag the ‘Two lines‘ to the left of the user category
- To ‘Edit‘ or ‘Delete‘ the ‘User Category‘ select the ‘Three dots‘ to the right of the user category
- Select ‘Save‘

Profile Settings – User Category
Gender pronouns
Steps
- Navigate to the ‘Workbar’ and select the cog icon (Administration)
- You will be directed to the ‘Administration Screen’
- Select the ‘Profile settings‘ dropdown
- Select the ‘Gender Pronouns‘ tab
- You will be redirected to the ‘Gender Pronouns‘ page
- Select ‘Add Gender Pronouns‘
- Input ‘Title‘ & ‘Description’
- Select the ‘Publishing Options‘ either ‘Published‘ or ‘Archive‘
- To reorder the ‘Gender Pronouns‘ drag the ‘Two lines‘ to the left of the gender pronouns
- To ‘Edit‘ or ‘Delete‘ the ‘Gender Pronouns‘ select the ‘Three dots‘ to the right of the gender pronouns
- Select ‘Save‘
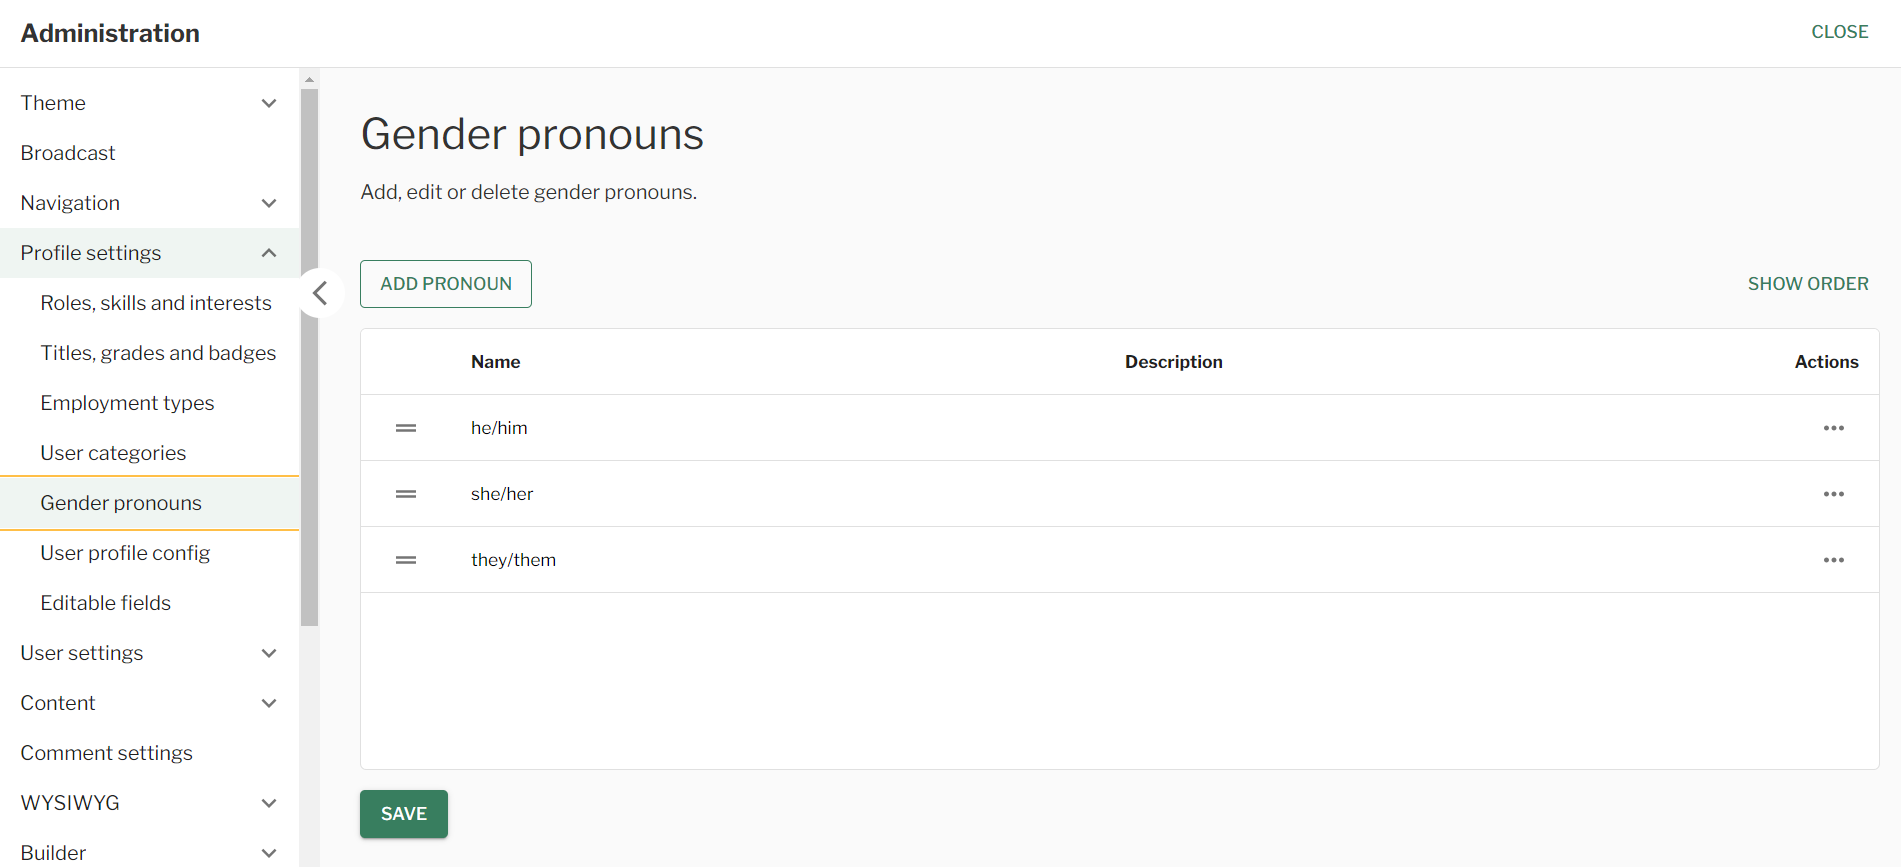
Profile Settings – Gender Pronouns
User profile config
Steps
- Navigate to the ‘Workbar’ and select the cog icon (Administration)
- You will be directed to the ‘Administration Screen’
- Select the ‘Profile settings‘ dropdown
- Select the ‘User Profile Config‘ tab
- You will be redirected to the ‘Empty User Profile Field Config‘ page
- Select the ‘Checkboxes‘ of the different fields that you would like to display for a users profile
- If it is all, select the ‘Checkbox‘ for ‘Display Field‘
- Input ‘Empty field text‘ for the different ‘Fields‘
- Select ‘Save‘
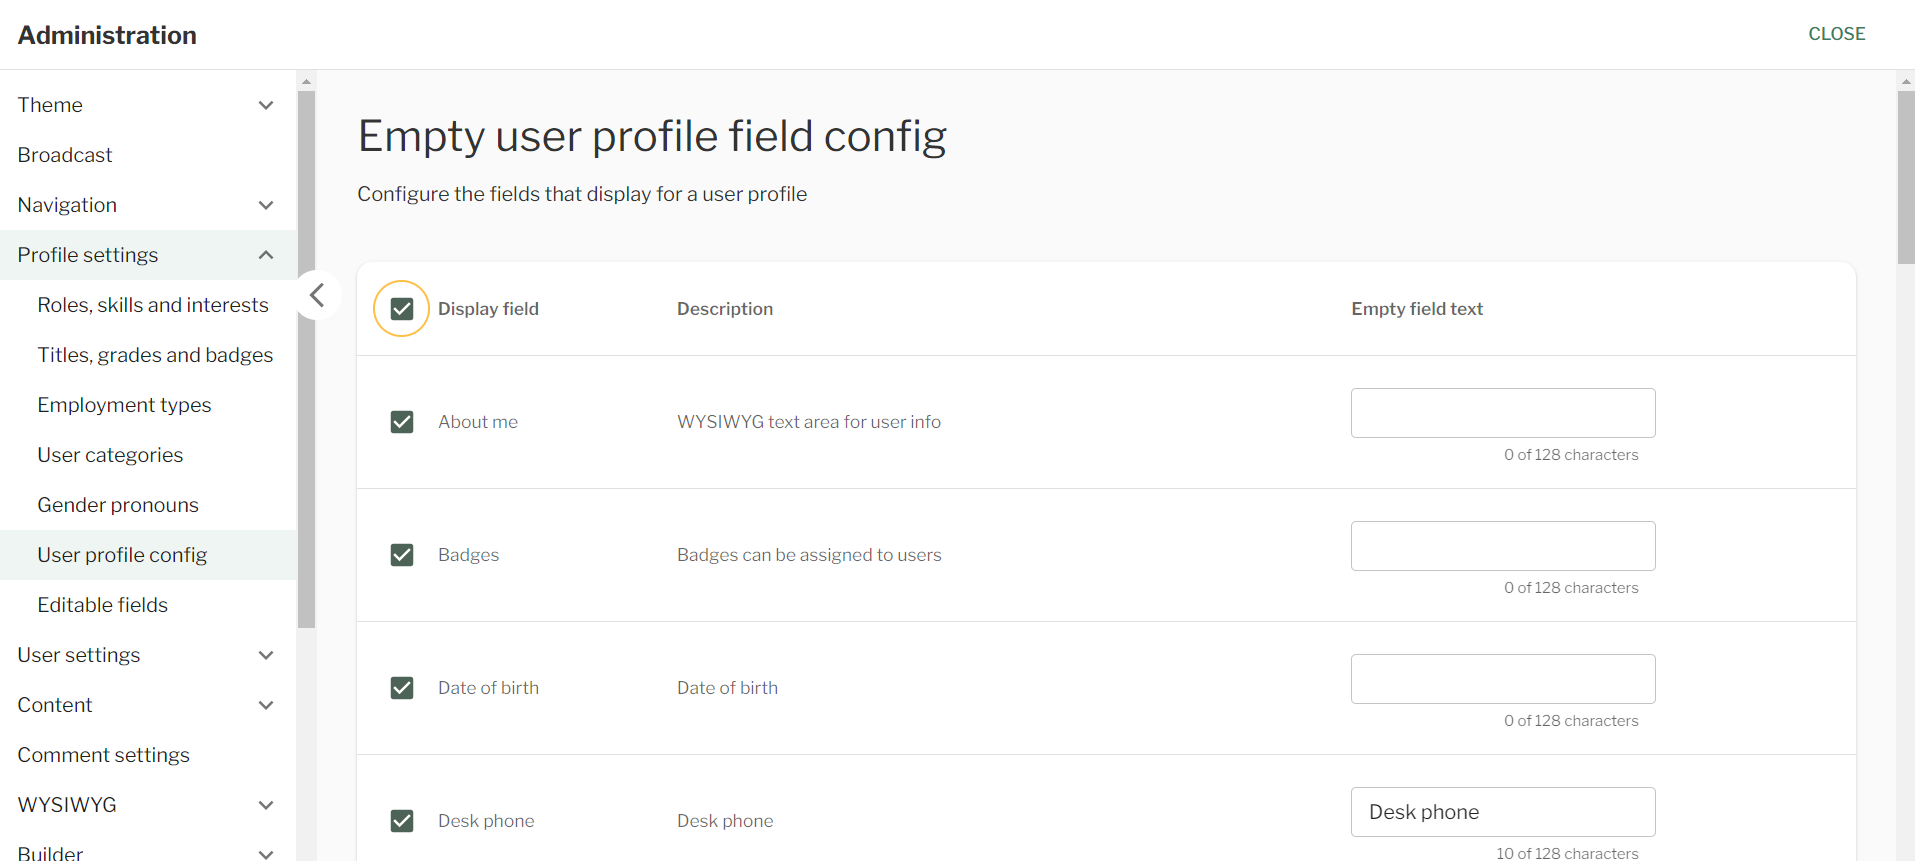
Profile Settings – User Profile Config
Editable fields
Steps
- Navigate to the ‘Workbar’ and select the cog icon (Administration)
- You will be directed to the ‘Administration Screen’
- Select the ‘Profile settings‘ dropdown
- Select the ‘Editable Fields‘ tab
- You will be redirected to the ‘Editable Fields‘ page
- Select the ‘Checkboxes‘ of the different fields that you would like to either ‘Hide‘ or ‘Disable‘
- If it is all, select the ‘Checkbox‘ next to ‘Hide‘ & ‘Disable‘ at the top of the table
- Select ‘Save‘

Profile Settings – Editable Fields
Couldn't find what you're looking for?
We're here to help. Please raise a support request via our help desk and we'll get back to you asap
Page content